The Dwemer remain one of Skyrim’s most fascinating mysteries. These ancient Deep Elves vanished without a trace, leaving behind sprawling ruins filled with deadly automatons, intricate mechanisms, and technology that defies the magic-dominated world of Tamriel. For players who’ve stumbled into Blackreach or faced down a Dwarven Centurion, the Dwemer represent both incredible danger and massive rewards.
This guide covers everything from Dwemer lore and disappearance theories to the best ruins for farming materials, strategies for defeating their mechanical guardians, and the essential questlines that reveal their secrets. Whether someone’s hunting for Aetherium or just trying to survive their first Dwemer dungeon, understanding this lost civilization makes exploration far more rewarding.
Table of Contents
ToggleKey Takeaways
- The Dwemer vanished instantly in 1E 700 during the Battle of Red Mountain, likely achieving zero-sum through Kagrenac’s tools, with the mystery remaining deliberately unsolved by game developers.
- Skyrim Dwemer ruins like Blackreach, Arkngthamz, and Mzulft offer critical questline content, puzzle challenges, and abundant smithing materials for mid-to-late game character progression.
- Shock magic, archery, and heavy armor builds dominate Dwemer ruins, while shock resistance gear and multiple healing potions are essential for surviving Dwarven Centurion boss encounters.
- Valuable Dwemer loot includes soul gems from automatons, Bent Scrap Metal with the best weight-to-ingot ratio, and unique items like the Aetherial Crown enabling dual Standing Stone abilities.
- The Dwemer’s enslavement of the Falmer and failed godhood attempt through the Heart of Lorkhan reveal a civilization defined by hubris, rationalism, and technological ambition unmatched in Tamriel’s 4,000+ years of history.
Who Were the Dwemer in Skyrim?
The History and Lore of the Deep Elves
The Dwemer weren’t actually dwarves, the name came from giants who called them “Dwarves” due to their relatively small stature. These Deep Elves were a clan of Mer who rejected the Daedra and Aedra entirely, instead pursuing science, engineering, and reason. They built massive underground cities across Morrowind, Skyrim, and Hammerfell during the First Era, creating technology that combined steam power, soul gems, and tonal architecture.
Unlike other races in Tamriel, the Dwemer focused on understanding the fundamental forces of reality. Their research into the Heart of Lorkhan, a literal god’s heart discovered beneath Red Mountain, led to breakthroughs in metallurgy and automation. They enslaved the Falmer (Snow Elves) after the Nordic conquest drove the Falmer underground, forcing them to consume toxic fungi that eventually devolved them into the twisted creatures players encounter today.
The Dwemer were master craftsmen and architects. Their ruins showcase geometric precision, bronze-gold aesthetics, and mechanical complexity that no other race has matched in thousands of years. Everything from their Centurions to their smallest gears demonstrates an understanding of engineering that feels more like steampunk science fiction than traditional fantasy.
Why Did the Dwemer Disappear?
The entire Dwemer race vanished instantly in 1E 700 during the Battle of Red Mountain. Not a single Dwemer remained, except for Yagrum Bagarn, who was in an Oblivion plane at the time and survives (as of Morrowind) as the last living Dwemer, afflicted with Corprus disease.
The prevailing theory connects their disappearance to Kagrenac, the Dwemer Chief Tonal Architect. Kagrenac created tools, Keening, Sunder, and Wraithguard, designed to tap into the Heart of Lorkhan and potentially achieve godhood or “anti-creation” for the entire race. When the Chimer (later Dunmer) attacked during the Battle of Red Mountain, Kagrenac reportedly struck the Heart with his tools in desperation.
What happened next remains speculation. The most accepted theory suggests the Dwemer achieved their goal of un-making themselves from existence, effectively zero-summing or merging into a collective consciousness. Another theory proposes they were transported to a different plane of Oblivion. The dragon Paarthurnax and various scholars reference the concept of achieving Amaranth or CHIM, esoteric metaphysical states, but the truth died with the Dwemer.
Arniel Gane’s experiments in Skyrim (detailed later) support the zero-sum theory. When he recreates Kagrenac’s work on a soul gem, he vanishes just like the Dwemer did, leaving no trace except spectral remains.
Where to Find Dwemer Ruins in Skyrim
Major Dwemer Ruins Worth Exploring
Blackreach is the crown jewel of Dwemer architecture, a massive underground cavern housing an entire city with glowing mushrooms, Falmer settlements, and multiple Centurions. Access points include Alftand, Mzinchaleft, and Raldbthar, all required during the main quest “Elder Knowledge.” Blackreach contains the Tower of Mzark (essential for the main quest), tons of Dwemer metal, and Crimson Nirnroot for a side quest.
Nchuand-Zel sits beneath Markarth and connects to Understone Keep. It’s accessible during “The Forsworn Conspiracy” questline and features relatively straightforward layouts perfect for early-to-mid level characters. The ruins contain a significant amount of scrap metal and several Dwemer schematics.
Arkngthamz serves as the starting point for “Lost to the Ages,” the Dawnguard DLC quest involving Aetherium. Located in the Reach, southwest of Markarth, it introduces players to Katria’s ghost and the Aetherium mystery. The Tonal Lock puzzle here requires firing the resonators in the correct sequence.
Avanchnzel lies east of Riften and features prominently in “Unfathomable Depths.” This ruin has one of the most vertical designs, with players descending through multiple levels. The Lexicon puzzle at the bottom grants the Ancient Knowledge ability, boosting Smithing experience by 15%.
Mzulft appears during the College of Winterhold questline in “Revealing the Unseen.” Located in the mountains southeast of Windhelm, it contains the Oculory, a massive Dwemer device for mapping celestial bodies and locating the Staff of Magnus. Focusing the Oculory using crystal arrangement provides one of the game’s most satisfying puzzle moments.
Hidden and Lesser-Known Dwemer Locations
Bthardamz in the Reach hosts “The Only Cure,” a Daedric quest for Peryite. The ruin is filled with Afflicted enemies (infected with Peryite’s plague) rather than typical Falmer. It’s substantial in size but often overlooked since it’s tied to a single quest.
Kagrenzel offers a unique experience, entering triggers a trap that drops players down a massive shaft into a Falmer-filled chamber. It’s located in the mountains northeast of Riften. The fall can kill characters without enough health, so save before entering. The ruin is small but memorable for that initial plunge.
Raldbthar serves as one of Blackreach’s entry points but has substantial above-ground sections. The exterior features battling Bandits and Dwarven Spheres, creating an unusual combat scenario. Inside, the Deep Market area showcases Dwemer commercial architecture.
Irkngthand appears during the Thieves Guild questline “Blindsighted,” where players confront Mercer Frey. The ruins flood during the final confrontation, and players must swim through the collapsing sections. It’s one of the few Dwemer ruins featuring significant water-based traversal.
For players looking to maximize their exploration efficiency, many essential Skyrim techniques apply to dungeon diving, including inventory management and tactical positioning.
Understanding Dwemer Technology and Automatons
Types of Dwemer Automatons and How to Defeat Them
Dwarven Spiders are the most common automatons, small, fast-moving constructs that deal lightning damage. They’re vulnerable to shock resistance and die quickly to melee attacks. Workers carry soul gems, while Guardians hit harder. Their low health pools make them manageable even at lower levels, but groups can overwhelm unprepared players.
Dwarven Spheres roll into balls for rapid movement and extend blades for combat. They’re significantly tougher than Spiders, with more health and higher damage output. Crossbow-equipped variants in Dawnguard add ranged threats. Frost damage works well against them, and dodge-rolling (in Special Edition with appropriate mods) helps avoid their charging attacks. Their soul gems are more valuable than Spider variants.
Dwarven Centurions are Dwemer boss-level constructs, massive bipedal tanks with steam attacks and devastating melee strikes. They’re resistant to frost but vulnerable to shock damage. The steam breath attack deals continuous fire damage and staggers, making it deadly in enclosed spaces. Strategies include:
- Maintaining distance and using ranged attacks
- Targeting them from elevated positions where their melee can’t reach
- Using Frost Atronachs or followers as tanks
- Stacking shock resistance gear before engaging
- Saving Centurion battles for after hitting level 15-20 minimum
Centurions have a weakness: their power core glows during combat. While not a targeted weak point mechanically, lore suggests this is their vulnerability. They drop Centurion Dynamo Cores essential for Dwemer-related crafting.
Dwarven Ballistas (Dawnguard DLC) function as automated turrets, firing bolts at intruders. They’re stationary but accurate. Destroy them quickly with magic or arrows before they shred health pools. According to detailed breakdowns on IGN, these additions significantly increased Dwemer ruin difficulty.
Dwemer Mechanisms and Puzzle Solutions
Dwemer ruins feature recurring puzzle types. Lexicon Receptacles appear in Avanchnzel and Tower of Mzark, requiring players to arrange cubes or beams in specific patterns. The Tower of Mzark puzzle involves pressing buttons to align light beams onto the Lexicon receptacle, pattern recognition rather than randomness.
Tonal Locks use resonators that must be struck in sequence. Arkngthamz introduces this during “Lost to the Ages.” The correct sequence is revealed through notes or trial-and-error. Listen for the tone changes: incorrect sequences reset the puzzle.
Steam Valve Pipes control gates and bridges. Players must find and turn valves to redirect steam pressure, opening paths. These rarely have complex solutions, exploration usually reveals the valve location within the same chamber.
Attunement Spheres are special devices granted during quests (like “Discerning the Transmundane”) that unlock specific doors. Without the sphere, certain areas remain inaccessible, gating progress appropriately.
Kinetic Resonators in Arkngthamz require shooting them with arrows or spells in the correct order: bottom left, bottom right, top right, top left, center. This specific sequence unlocks the gate to proceed.
Valuable Dwemer Artifacts and Loot
Dwemer Metal and Smithing Materials
Dwemer ruins are goldmines for smithing materials. Dwemer Scrap Metal comes in various forms:
- Large Dwemer Strut (20 lbs, 15 ingots)
- Solid Dwemer Metal (25 lbs, 5 ingots)
- Large Decorative Dwemer Strut (15 lbs, 2 ingots)
- Small Dwemer Lever (2 lbs, 1 ingot)
- Bent Dwemer Scrap Metal (2 lbs, 3 ingots)
- Large Dwemer Plate Metal (10 lbs, 3 ingots)
The weight-to-ingot ratio matters. Bent Dwemer Scrap Metal yields the best ratio at 1.5 ingots per pound. Solid Dwemer Metal is the worst at 0.2 ingots per pound. Smart farmers target Bent Scrap and Small Levers while ignoring Solid Metal unless they’re desperate.
Dwemer Cogs, Gears, and Gyros serve decorative purposes but have minimal gameplay value. Cogs weigh 10 lbs for 10 gold, terrible inventory efficiency. Collectors want them for player homes, but practical players skip them entirely.
Soul Gems drop from Dwarven automatons regularly. Spiders carry Petty to Lesser gems, Spheres drop Common to Greater, and Centurions drop Grand Soul Gems. With the frequency of Dwemer enemies, ruins become soul gem farming routes.
Dwemer metal smelts into Dwarven Metal Ingots at any smelter. These ingots craft Dwarven armor and weapons (requires Dwarven Smithing perk, level 30 Smithing). While Dwarven gear isn’t endgame material, it’s excellent for mid-game and extremely profitable to craft and sell.
Players focused on efficient material farming should review Skyrim strategies for optimizing carry weight and merchant runs.
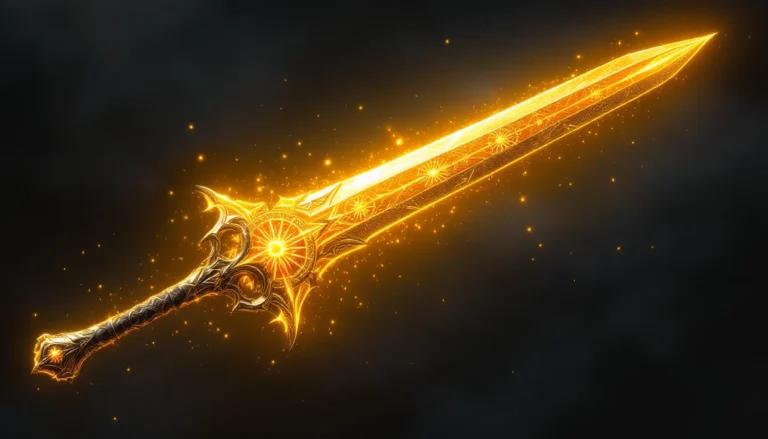
Unique Dwemer Weapons and Armor
Few unique Dwemer items exist, but those that do offer distinct advantages:
Zephyr (Arkngthamz, “Lost to the Ages”) is a Dwarven Bow with a unique enchantment: 30% faster draw speed. It’s not marked as enchanted, so players can add their own enchantment on top. For archery builds, Zephyr’s speed makes it one of the best bows in the game, especially for DPS-focused playstyles.
Aetherial Crown (Aetherium Forge) allows players to have two standing stone abilities simultaneously. Combined with the Atronach Stone and Mage Stone, or Lover Stone and Warrior Stone, this creates powerful hybrid builds. It’s one of three items craftable at the Aetherium Forge.
Aetherial Shield (Aetherium Forge) bashes have a chance to make enemies completely intangible for 15 seconds, removing them from combat. It’s situational but hilarious against tough enemies. They phase out and can’t attack or be attacked.
Aetherial Staff (Aetherium Forge) summons a Dwarven Spider or Sphere for 60 seconds. It’s the weakest of the three Aetherium items for most builds, though conjuration builds might appreciate the thematic summon.
Enhanced Dwarven Crossbow (Dawnguard DLC) is craftable after finding the schematic in certain Dwemer ruins. It ignores 50% of armor, making it devastating against heavily armored enemies. The explosive bolt schematic adds AoE damage, turning the crossbow into a mid-range powerhouse.
While Dwemer artifacts might not dominate meta discussions on Twinfinite, they provide strong mid-game options and build-enabling tools like the Aetherial Crown.
Key Dwemer-Related Quests and Storylines
The Elder Knowledge Main Quest
“Elder Knowledge” forces players into the Dwemer city of Blackreach as part of the main storyline. Paarthurnax sends the Dragonborn to recover an Elder Scroll, which Septimus Signus reveals is located in the Tower of Mzark within Blackreach.
Access requires reaching the tower through Alftand, a sprawling ruin filled with Falmer, Chaurus, and Dwarven automatons. The expedition encounters J’zhar and J’darr’s doomed research party, their journals detail their descent into madness and cannibalism, adding environmental storytelling.
Once in Blackreach, players navigate to the Tower of Mzark and solve the Lexicon puzzle. The tower’s mechanism extends upward, revealing the Elder Scroll in a dramatic sequence. This quest provides most players their first extensive Dwemer experience and introduction to Blackreach’s scale.
After retrieving the scroll, “Discerning the Transmundane” continues Septimus’s storyline, requiring players to harvest blood from multiple Mer races and return to a Dwemer lockbox. The quest reveals Septimus’s Daedric allegiance to Hermaeus Mora and grants the Oghma Infinium.
Lost to the Ages and the Aetherium Forge
This Dawnguard questline begins when players read “The Aetherium Wars” or encounter Katria’s ghost near Arkngthamz. Aetherium was a rare Dwemer material more valuable than gold, sparking wars between Dwemer cities that contributed to their vulnerability before the Battle of Red Mountain.
Katria, an adventurer who died searching for the Aetherium Forge, guides players through four Dwemer ruins to collect Aetherium Shards:
- Arkngthamz – Solve the Tonal Lock by striking resonators in sequence
- Raldbthar – Navigate the Deep Market and defeat the Centurion
- Mzulft – Return to the Aedrome and claim the shard from the Dwemer Storeroom
- Bthalft – Solve the Forge puzzle using the Aetherium Shards to create a crest
The Aetherium Forge beneath Bthalft allows crafting one of three artifacts: Crown, Shield, or Staff. Most players choose the Crown for its dual-Standing Stone ability. The quest showcases Dwemer innovation at its peak and provides gameplay rewards worth the extensive dungeon crawling.
Katria’s story adds emotional weight. Her journal entries reveal her partner Taron betrayed her, stealing her research. Players avenge her academic legacy by completing what she couldn’t, and she finds peace at the Forge.
Arniel’s Try and Dwemer Research
This College of Winterhold questline involves helping Arniel Gane research the Dwemer disappearance. Players gather items: Dwarven Cogs (10 total) from various ruins and Dwemer Convectors from specific locations.
The Convectors must be “heated” in Dwemer ruins by placing them near active Dwemer machinery:
- Alftand (Animonculory)
- Mzulft (Boilery)
- Bthalft or other ruins with active machinery
Arniel’s goal mirrors Kagrenac’s experiment. He obtained Keening, one of Kagrenac’s tools, from the Nerevarine (Morrowind’s protagonist) and attempts to replicate the Heart of Lorkhan experiment using a soul gem.
When Arniel strikes the Convector with Keening, he vanishes completely, zero-summing just like the Dwemer. Players receive Summon Arniel’s Shade, allowing them to summon his spectral form as a follower. The quest provides direct experimental evidence for what likely happened to the Dwemer, making it essential lore content.
Players diving deep into these questlines will find additional context in broader Skyrim guide resources for optimizing quest order and rewards.
Tips for Exploring Dwemer Ruins Safely
Recommended Character Builds and Skills
Dwemer ruins favor certain builds. Archery dominates because most corridors provide sightlines for stealth kills before Falmer and automatons engage. Dwarven Spheres and Spiders close distance fast, but skilled archers can drop Spiders before they reach melee range.
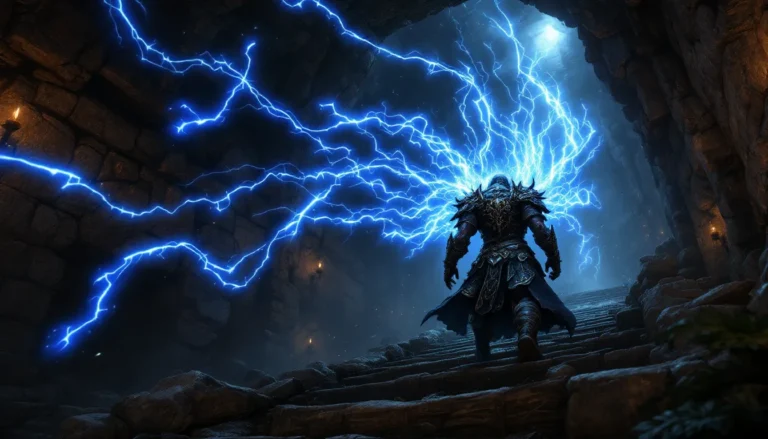
Shock magic (Destruction) is highly effective against all automatons. Lightning Bolt and Chain Lightning tear through Centurions and Spheres faster than frost or fire. Automatons resist frost by 25-50%, making ice magic suboptimal even though Falmer vulnerability to it.
Heavy Armor builds survive better than light armor in Dwemer ruins due to the high physical damage from Centurions and Sphere charges. Dwarven Armor (craftable from ruin materials) provides thematic and practical mid-game protection.
Sneak remains broken in Skyrim, and Dwemer ruins are no exception. Falmer are blind and rely on sound, making them easier to sneak past than most enemies. Automatons have standard detection, so high Sneak skill plus Muffle enchantments enable ghost runs through entire sections.
Conjuration builds can summon meat shields (Frost Atronachs work well) to tank Centurion aggro while players deal damage from safety. Storm Atronachs provide shock damage against automatons but are fragile.
Smithing benefits heavily from Dwemer exploration due to abundant materials. Players who regularly clear ruins level Smithing faster than almost any other method, the sheer volume of Dwarven Metal Ingots available makes crafting Dwarven gear in bulk profitable and efficient for leveling.
For players building characters specifically for dungeon diving, applying best Skyrim build principles ensures optimal combat performance.
Essential Items and Preparations
Shock Resistance gear mitigates Spider and Sphere lightning attacks. The Agent of Mara blessing (Temple of Mara questline) grants 15% magic resistance. Shock enchantments on armor or the Resist Shock potion stack to near-immunity.
Lockpicking skill or perks help, though most Dwemer ruin doors use keys or puzzle mechanisms rather than locks. Still, numerous chests and side rooms require lockpicking. Bringing lockpicks is mandatory, 30+ for extended ruin dives.
Potions of Healing and Stamina keep players alive during Centurion fights. The steam breath attack chunks health rapidly, and healing potions outpace the damage. Stamina potions enable power attack chains or sprinting away from danger.
Cure Disease potions matter less in Dwemer ruins than Draugr tombs since automatons don’t carry disease. But, Falmer do cause diseases and Chaurus poison, so carrying 2-3 Cure Disease potions prevents trips back to town for shrine cures.
Follower choice impacts ruin survivability. Followers like Lydia or J’zargo can tank or provide ranged support. J’zargo’s Flame Cloak scroll works well in tight Dwemer corridors. Followers with shock resistance (via enchanted gear) survive longer against Spheres.
Carry weight management becomes critical. Dwemer metal is heavy, and ruins contain hundreds of pounds of scrap. Options include:
- Bringing a follower to carry metal (they can carry ~300 lbs)
- Using the Steed Stone for +100 carry weight and no armor weight penalty
- Enchanting armor with Fortify Carry Weight
- Making multiple trips or using fast travel strategically
Questline preparation: Before entering Blackreach for the first time, stock up on supplies. Blackreach is massive, and leaving means re-traversing Alftand or other entry ruins. Bringing 50+ arrows, multiple soul gems for recharging enchanted weapons, and enough healing items for extended combat saves headaches.
Players can leverage specialized Skyrim tools for inventory management and planning loadouts before major ruin expeditions.
The Legacy of the Dwemer in Elder Scrolls Lore
The Dwemer’s absence defines their legacy more than their presence ever did. In the 4,000+ years since their disappearance, no civilization has replicated their technology. The Tribunal (Almalexia, Vivec, Sotha Sil) used Kagrenac’s tools to achieve godhood by tapping the Heart of Lorkhan, but they never understood how to create similar devices.
Sotha Sil, the most technologically inclined Tribunal member, spent centuries reverse-engineering Dwemer mechanisms for his Clockwork City. Even with divine power and millennia of study, he couldn’t fully recreate Dwemer innovation, he built upon it but never matched it. This positions the Dwemer as the greatest engineers in Tamrielic history, unmatched and unmatchable.
Dwemer philosophy rejected faith entirely. They saw the Aedra and Daedra as powerful but not worthy of worship, pursuing empirical understanding instead. This rationalist approach led to breakthroughs but also to hubris. Kagrenac’s attempt to use the Heart of Lorkhan represents the ultimate expression of Dwemer philosophy: controlling the divine through technology and tonal manipulation.
The enslavement of the Falmer remains the Dwemer’s darkest legacy. When the Snow Elves fled underground after Nordic conquest, the Dwemer offered sanctuary, then enslaved them, forcing them to consume toxic fungi that destroyed their sight and minds over generations. The blind, hostile Falmer in Dwemer ruins are the descendants of those Snow Elves, showing the consequences of Dwemer cruelty.
Yagrum Bagarn’s survival (as of TES III: Morrowind) provides the only living testimony to Dwemer culture. Afflicted with Corprus and unable to die, he serves as a repository of knowledge but also a tragic figure, the last of his kind, watching the world move on without his people.
The Numidium, a massive Dwemer construct powered by the Heart of Lorkhan, became a reality-warping weapon used in later eras. Tiber Septim used it to conquer Tamriel, and it appeared again in Daggerfall’s multiple endings. The Numidium represents Dwemer ambition at its peak: a god-machine designed to impose their will on reality itself.
Modern scholars in Tamriel study Dwemer ruins obsessively. Calcelmo of Markarth dedicates his life to translating Dwemer language and understanding their culture. His museum in Understone Keep preserves artifacts, and his research notes (stolen during the Thieves Guild questline) remain the most comprehensive Dwemer linguistic work.
Dwemer ruins also impact modern Skyrim politics. Markarth’s entire foundation rests on Dwemer architecture, with Understone Keep carved into a pre-existing Dwemer city. The Reach’s instability ties partially to control over these valuable ruins and their resources.
Community interest in Dwemer lore extends to extensive modding efforts on platforms like Nexus Mods, where creators expand Dwemer content, rebuild cities, and explore “what if” scenarios about their return. The Dwemer’s mysterious disappearance ensures they remain a focal point for Elder Scrolls speculation and creativity.
For players wanting to explore Dwemer content thoroughly, many top Skyrim lists include Dwemer-focused mods that add new ruins, quests, and lore-friendly expansions to the base game experience.
Conclusion
The Dwemer represent everything that makes Elder Scrolls lore compelling: mystery, tragedy, and philosophical depth wrapped in excellent dungeon design. Their ruins offer some of Skyrim’s best exploration content, combining combat challenges, environmental storytelling, and valuable loot. Whether someone’s farming Dwarven Metal Ingots, hunting for Aetherium, or just trying to understand what happened at Red Mountain, the Dwemer provide endless gameplay and narrative hooks.
Their disappearance remains unsolved by design. Bethesda has confirmed they won’t definitively answer what happened to the Dwemer, preserving the mystery for future games. This makes every ruin feel like a piece of an unsolvable puzzle, players can theorize, discover journals and research notes, even replicate their experiments through Arniel’s questline, but the final truth stays just out of reach.
That unknowability is what keeps players returning to Blackreach, Arkngthamz, and dozens of other ruins across multiple playthroughs. The Dwemer were trying to transcend reality itself, and whether they succeeded or failed, they took their answer with them into the void.